

![]()
![]()
Don't miss this
goldmine of free drum set lessons w/video.
Be sure to look into each of the Lesson Menus at the top of each page while you are here. You have discovered a treasure-trove of
free online drum set lessons. This is a complete $2,000 course in drum set techniques, for free! No sign-ups required. No tricks! You may e-mail me with your questions
without fear of being placed on a spam list. This a promise and a guarantee from the author of these lessons and your teacher, Bill Powelson.
![]()
![]()
If you do not yet own a drum set just keep practicing the way you have been. You will appreciate this lesson a little more when you finally get your drums. This lesson is for those students with horrible sounding drums.
I contend that even the cheapest drums may be tuned to your satisfaction. The secret is in knowing how to get the sound that you want. It needs to be noted that there isn't a specific standard-pitch for tuning our drums.
We tune to our ear. Inside our 'mind's ear' we must first imagine, exactly how we want the drum to sound; then we set about pulling that exact tone from the drum. No one should dictate to the drummer what their drums should sound like. We all tune to our own personal specifics. What pleases me may not please you at all . . . and vice versa.
When tuning a drumset, we must know what tones we are looking for and we must learn how to pull those specific tones from each drum. I have assembled the following pointers to help with that one objective in mind.
Look closely at your snare drum and try to decide exactly what factors most effect the tonal quality. Notice the 'square headed screws' around the top and bottom rims of the Drum. We call these ‘tension rods' or 'tension screws'. We may tighten or loosen these screws with a tool called a 'drum key. A drum key can be purchased at any music store for a dollar or two. Adjustments to the tension rods with a drum key will effect the tension on the Drumhead.
A tight drumhead will produce more bounce for the drumsticks and a higher pitch, whereas less tension on the head will produce the opposite. A little experimentation will help you decide the exact tension you personally prefer. You will be tuning your drums to your own specifics and personal preferences.
Be cautious when adjusting the tension-screws around any drumhead so as not to warp either the drumhead or the rim. Do not over-tighten one screw while leaving another very loose. It is best to tighten the screws in a diagonal criss-cross pattern around the head. Cautiously turn each tension-screw an equal number of turns until you have achieved the desired tension. Doing so will help seat the drum-head evenly.
Now turn your snare drum over and look at the strands of wire underneath. We call these (plastic or metal) wires, ‘snares'. The ‘snares' produce the ‘snap' sound and give the ‘snare' drum its name. Without these ‘snares' your drum would sound like a tom-tom. The snare wires are usually connected on the bottom sides of the drum with a screw apparatus and usually a flip lever apparatus. The flip lever on most drums is usually designed to release the snares quickly, so that a tom effect can also be quickly achieved as a tonal option.
A flip-lever and/or screw-apparatus on the side of the drum called the ‘strainer' may be tightened to place the desired amount of tension on the snares (wires) beneath the drum. This will require some experimentation before you will discover the exact snap or (looser resonant) tone you prefer.
After tuning both heads and adjusting the Strainer you may find that your Snare Drum still emits an undesirable 'ring' or 'overtone' when struck a glancing blow with a drumstick. Too much vibration in the outer perimeters of the 'batter' (top) head will often cause this overtone, and some type of muffling device may be necessary.

A drum muffler is simply a screw device that places a felt pad against the batter head from inside the drum. The muffler is usually equipped with a flip lever or turn screw that allows for easy external adjustment. Almost all older snare drums came from the factory with internal mufflers installed. In recent years the foreign drum set manufacturers have stopped putting them in the newer drums. (They need to know that those old internal-mufflers are missed.) The internal mufflers served an important function that is now being neglected. Almost any music store will install the older style internal mufflers for twenty or thirty dollars (per drum). Again it is up to you to decide whether you like your drum with or without a muffler.
![]()
![]()
Check out the individual accessory courses (products) in the right column and bottom of this page! You can get ALL of them free, with a simple donation of $45.00 or more. Those courses will show you how to put the $45 right back into your own pocket, A THOUSAND TIMES!
BUY ONE PRODUCT, GET ALL THE OTHERS FOR FREE! ![]()
![]()
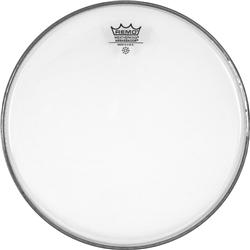
If you are still dissatisfied with your tone at this point, you should look at the batter head (top head). Batter heads are manufactured at varied thicknesses or weights ranging from thin to thick. Thin heads are designed for very light, snappy, crisp tonal qualities but have a tendency to break under heavy use. Thick drumheads will withstand a great deal of punishment but some tonal quality will be sacrificed, (in my own opinion). The choice is yours. I prefer a Remo Ambassador Coated head on my snare drums. It is a medium thickness that allows for great tone and lasting durability as well. The rougher surface of the coated-heads will allow for more 'snap' and sizzle' when using brushes with softer music styles.
![]()
![]()
Many high tech solutions to drum tones have appeared on the market in recent years. Experiment with some of the following options:

We may get a solid "thud" or "poof" effect in the following ways:
Here is an interesting, tongue-in-cheek, and somewhat controversial article, concerning How and Why Many Pro-Drummers Muffle their Bass Drum.
Money-Saving-Tip :
Place a small patch of duct tape at the point where the Bass Drum Beater-Ball makes contact with the bass drum head. This
will have little effect on the tone but it will inhibit wear on the head, prolong its life and save money.
If you are still dissatisfied with your tone at this point, check around and listen to other drummers until you find one who has found the sounds that you like. Then ask how to get that sound. That is precisely the way I acquired these few tricks that I am sharing with you now.
Tonal Losses:
Brand-name Mylar (plastic) drum heads rarely lose their tone.
However; tonal losses may occasionally occur as a result of lug-screws vibrating loose. A lock-washer
should be in place between the screw and where it makes contact with the rim of the drum. The lock-washers will
prevent the lug-screws from vibrating and backing-out of their position, loosening the tension on the drum heads.
Also; some of the 'cheaper' mylar heads will dent as a result of very heavy playing. This can eventually result in tonal fluctuation
and loss. As the dents (or bubbles) in the drum head begin to effect the tone of the drum,
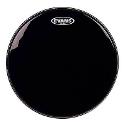
the heads should be replaced with quality, brand-name heads like 'Remo' or 'Evans'. Quality drum heads rarely lose their tone.
Tip:
WARNING FOR NEWBIES: It's easy to spot a 'green' drummer onstage. The less experienced drummer will constantly try to tune and re-tune
their drum set in the middle of their gigs. If you are one of those you should understand the following reasoning . . .
Tuning problems often do occur as a result of room acoustics as we move our drums from room to room and from one venue to the next. This means there are very often many tuning and tonal factors that are beyond our immediate control, in such situations. The more experienced pro-drummer will know immediately that it isn't the fault of the drums, but more likely the uncontrollable fault of the room itself.
Try This Experiment!
Take your snare drum to the garage, the bathroom or any room with a lot of hard surfaces like concrete floors and cinder-block walls.
Listen to the tones! Next, take the drum (as it is) into the living room or a room with an abundance of absorbent materials like,
curtains, carpets, soft easy-chairs and couches. Strike the drum in those new surroundings. Notice the tonal differences! Next, take the drum
outside and strike it again in the out-door environment. Notice the tonal differences there as well. The locational changes will
have a great effect on
the tones, though we've done nothing to the drum itself. We must accept this as a difficult to remedy fact.
This is something we may have to learn to live with to some degree. Yes, it can kill a gig completely. It's true with all instruments. Some rooms (or environments) are better than others when it comes to natural acoustics. We can tune and re-tune the drums constantly and usually the result will most likely be worse tone, rather than better.
In other words; tune the drums to perfection in a good environment, then leave them alone. Unless a lug screw has worked loose or other some obvious physical factor is effecting the tone, the drums probably haven't lost their tunings. It's most likely the room-acoustics that is bugging your ear and causing you to think the drums are out-of-tune. Accept the fact that we can't easily change or fix the environment. Sometimes we must accept the facts and learn to live with most acoustical problems that can't be controlled.
Solutions? What Can Be Done? Are there possible solutions to such a dilemma as this? Yes, there are remedies, but they may often prove to be impractical.
![]()
![]()
If you are having problems adapting the dance beats to music, consider these two factors:
Next Lesson (Suggestion):
RUDIMENTS, ROLLS and FILLS (Part 1): Boring rolls are not so boring when used as thundering fill
patterns in mid-song. (Simplified for beginners!)

![]()
![]()
![]()
![]()

![]() Drum Solo Video: Click to 'LEARN'
Drum Solo Video: Click to 'LEARN'
Watch and Learn Now! PLAY Great Drum Solos within hours (not years).
NEW 'Subliminal Method' teaches drum solo techniques PAINLESSLY!
Master rudiments 'NATURALLY' without boring regimentation or serious discipline.
Listen, watch and PLAY your way to awesome drum solos (and polished rudiments) BY SIMPLY HAVING FUN. . . . It works, folks!
Don't be a skeptic until you at least try it first.
![]()
![]()
7 EZ lessons to Rhythm-Guru Status.
E-mail support: (til I croak).
EZ Downloads to CDs/Flashdrives
Special Secret Seeds of Rhythm.
Breaking-into Career Drumming $$
![]()
![]()
![]()

Musical Time - Finite to Infinity: Learn to easily jam and play music comfortably within any odd or even time signature. This material isn't currently taught in music-theory classes, yet it is simple enough for grade-school students. Discover more than 18 quintillion unique and different (modern music) song-beat structures.
Discover the (lost) 500 year-old enigmatic secrets hidden within the current time-signature system. Seven short mesmerizing and easy-to-follow lessons will lead you quickly and easily towards (musical-time) guru status. You will learn to visualize (read, write or feel) the existence More . . .
![]()

This very informative little booklet will amaze you with hundreds of valuable tips and insider secrets!
HOW TO: Purchase old/used drumsets for pennies and resell them for decent profits. How to find the bargains, create thousands of attention getting finishes at low cost. Brighten old cymbals and learn to rebuild old drumsets from the gound up.